The open road calls with promises of redwood forests becoming your science lab, national monuments transforming into history class, and starlit skies serving as your astronomy textbook. For road-schooling families, an RV isn’t just a vehicle—it’s a mobile classroom, a tiny home, and the gateway to experiential education. But when your adventurous lifestyle includes a crawler, toddler, or curious preschooler, that dream can quickly feel like a safety nightmare on wheels. The unique convergence of constant motion, compact living, and dual-purpose spaces creates hazards that traditional baby-proofing guides simply don’t address.
Baby proofing an RV for road-schooling families requires a paradigm shift from static home safety to dynamic, travel-ready protection. You’re not just guarding against bumps and bruises; you’re engineering a secure environment that must withstand highway vibrations, adapt to ever-changing campsites, and still foster the independence your young learner needs. This comprehensive guide walks you through the essential strategies, considerations, and systems that experienced RV families use to create safe mobile nests without sacrificing the freedom that makes road-schooling extraordinary.
Top 10 Baby Proofing for Road-Schooling Families
Detailed Product Reviews
1. Inaya Complete 50pc Deluxe Baby Proofing Kit - Flexible Hidden Baby Locks for Cabinets and Drawers, Adjustable Child Safety Latches, Corner Guards & Furniture Anchors
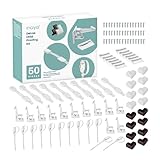
Overview: The Inaya Complete 50pc Deluxe Baby Proofing Kit offers a comprehensive home safety solution for parents of children up to five years old. This all-in-one package includes 10 adjustable multi-use latches, 12 flexible cabinet locks, 16 foam corner protectors in dual colors, and 12 heavy-duty furniture anchors. The kit addresses multiple hazard zones—from sharp edges to tipping furniture—in a single coordinated system, eliminating the need for piecemeal purchases.
What Makes It Stand Out: This kit’s four distinct product categories provide exceptional coverage that basic kits simply don’t match. The flexible locks feature a minimal, hidden design that blends seamlessly with modern cabinetry, preserving your home’s aesthetic. The dual-color corner bumpers (eight gray and eight brown) offer design flexibility, while the furniture anchors support an impressive 85 pounds with versatile mounting options. Backed by a one-year warranty, video installation guides, and responsive customer service, Inaya delivers confidence beyond the hardware.
Value for Money: At $49.99 ($1.00 per piece), the kit presents solid value compared to individual purchases. The heavy-duty anchor construction and thoughtful aesthetic details justify the premium over budget alternatives. The included warranty and instructional support enhance the investment, particularly for parents prioritizing comprehensive, long-term coverage.
Strengths and Weaknesses: Strengths: All-in-one comprehensive solution; aesthetically pleasing hidden lock design; dual-color corner protectors; high weight capacity furniture anchors; excellent customer support with warranty. Weaknesses: Higher price point may deter budget-conscious buyers; adhesive corner protectors could damage furniture finishes; installing 50 pieces requires significant time investment.
Bottom Line: The Inaya Deluxe Kit is ideal for parents seeking a complete, cohesive baby-proofing system without compromising on aesthetics. While pricier than basic alternatives, its comprehensive coverage and quality construction make it a worthwhile investment for thorough home safety.
2. Safety 1st Essentials Child Proofing Kit- 46 Piece

Overview: The Safety 1st Essentials Child Proofing Kit delivers a streamlined, budget-conscious approach to home safety with 46 pieces targeting three critical hazard areas. This kit includes four grip-and-twist door knob covers, twelve wide-grip latches for cabinets and drawers, and thirty press-and-pull outlet plug protectors. It provides fundamental protection for families seeking essential coverage without complexity.
What Makes It Stand Out: Leveraging Safety 1st’s trusted brand reputation, this kit focuses on the most common household hazards with proven, straightforward solutions. The grip-and-twist door covers effectively restrict room access without complicated mechanisms, while the generous thirty outlet protectors exceed typical kit quantities. The wide-grip latches offer versatile cabinet security, creating a focused trio of essential safety tools.
Value for Money: At $15.29 (under $0.33 per piece), this kit delivers exceptional affordability. It’s ideal for renters, grandparents’ homes, or as a starter set for new parents. While lacking premium features, the cost-per-item ratio is outstanding, making comprehensive basic protection accessible without financial strain.
Strengths and Weaknesses: Strengths: Extremely affordable from a trusted brand; generous quantity of outlet covers; straightforward installation; covers essential safety zones; lightweight and removable for renters. Weaknesses: No corner guards or furniture anchors; limited aesthetic options; basic functionality without advanced features; door covers may not fit all knob styles; plastic construction less durable than premium alternatives.
Bottom Line: This kit excels as an entry-level or supplementary solution for families prioritizing affordability and essential coverage. It won’t provide complete home protection alone, but it’s an excellent value for addressing the most critical hazards on a tight budget.
Understanding the Unique Challenges of RV Baby Proofing
RVs present a fundamentally different environment than traditional homes. The constant vibration during travel can loosen screws, dislodge latches, and turn seemingly secure items into projectiles. Space constraints mean every inch serves multiple purposes, eliminating the luxury of dedicated baby zones. Road-schooling adds another layer—your mobile classroom needs to be both safe and accessible for hands-on learning. Unlike stationary homes, your environment changes daily: one day you’re boondocking in remote wilderness, the next you’re in a bustling RV park with different external hazards.
The materials and construction methods in RVs also differ significantly. Lightweight composite walls won’t hold standard anchors, curved surfaces challenge conventional mounting hardware, and the prevalence of propane, 12-volt, and 120-volt systems in close proximity creates complex electrical scenarios. Your baby-proofing strategy must account for motion dynamics, weight limitations, and the reality that what works perfectly while parked may fail catastrophically at 60 mph.
Starting with a Safety Audit: Your Pre-Trip Checklist
Before installing a single latch, conduct a comprehensive safety audit of your RV while both stationary and in motion. This foundational step identifies unique vulnerabilities in your specific rig.
The Stationary Assessment
Begin by crawling through your RV at your child’s eye level. You’ll discover hazards invisible from adult height: exposed wiring under dinette benches, sharp cabinet corners at forehead level, and gaps between furniture perfect for tiny arms. Map every surface, hinge, and opening. Pay special attention to slide-outs—these create pinch points and gaps that change when extended versus retracted. Document everything with photos; these become your teaching tools later.
The Motion Simulation Test
Here’s where RV baby proofing diverges from house proofing. Load your RV as you would for travel, then have an adult simulate a child’s movements while another drives through a parking lot. Items you thought were secure will shift. Cabinet doors may swing open despite latches. That decorative basket becomes a projectile. This real-world test reveals the difference between theoretical security and travel-tested safety.
Securing Furniture and Built-ins for Motion Travel
Standard furniture anchors designed for residential use often fail in RVs due to wall construction and dynamic forces. The key is understanding shear strength versus tensile strength in mobile applications.
Wall Construction Realities
Most RV walls consist of a thin fiberglass exterior, foam insulation, and 1/8-inch luan plywood interior—essentially heavy-duty cardboard. Traditional drywall anchors pull out under minimal stress. Instead, focus on distributing force across larger surface areas. Look for mounting systems that spread load across multiple studs or use backing plates. When securing heavy items like TVs, consider through-bolting with large washers on the exterior wall side, properly sealed against moisture intrusion.
Dynamic Load Calculations
A 20-pound cabinet door exerts over 60 pounds of force during a sudden stop. Multiply this across every unsecured item. Your securing strategy must account for acceleration, deceleration, and lateral forces in turns. For furniture that must remain functional, consider marine-grade locking mechanisms designed for yachts, which face similar motion challenges. These often feature positive-locking systems that require deliberate action to release, preventing accidental opening from vibration.
Cabinet and Drawer Locks: Beyond the Basics
Generic magnetic locks may work for stationary drawers but often fail when every bump in the road provides a hammering force against the latch. Road-schooling families need graduated security systems.
Vibration-Resistant Mechanisms
Seek locking systems with mechanical advantage—cam locks, deadbolt-style latches, or multi-point securing systems. The lock should require a deliberate motion completely different from the natural swing of travel. For example, a latch that lifts up before swinging open resists the forward-backward motion of travel better than a simple magnetic pull. Test every lock by tapping it with a rubber mallet; if it releases from impact, it will fail on a pothole-ridden highway.
Accessibility Versus Security Balance
In a 200-square-foot RV, you can’t lock everything. Create a hierarchy: red-level locks for items that are dangerous (cleaning supplies, tools), yellow-level for items that create messes (pantry items, art supplies), and green-level for everyday items. This teaches your road-schooled child risk assessment while keeping truly hazardous materials inaccessible. Involve older siblings in this categorization—it becomes a practical math and safety lesson.
The Kitchen: Creating a Safe Mobile Culinary Space
The RV kitchen combines propane, electricity, sharp objects, and breakables in the smallest footprint of any home area. During travel, it becomes a chaotic zone where nothing stays put.
Appliance Securing Strategies
Your stove needs a double-locking system: one to prevent burner knob activation, another to keep the oven door closed. Look for metal components rather than plastic, which becomes brittle in temperature extremes. For the refrigerator, standard child locks won’t withstand the weight of contents shifting. Consider installing a hasp and padlock system for travel days, removed only when parked. The microwave should be bolted to its cabinet, not just resting on a shelf—vibration degrades mounting screws over time, so check torque monthly.
Projectile Prevention Systems
Every item in your kitchen must answer the question: “Where does this go during travel?” Install retaining bars in cabinets, use silicone mats with raised edges in drawers, and consider magnetic strips for metal utensils. Glass items should live in padded containers, even inside cabinets. The road-schooling lesson here involves physics: have older children calculate force (mass × acceleration) for various items, driving home why that ceramic mug can’t live on the counter.
Bathroom Safety in Compact Quarters
RV bathrooms are essentially wet rooms where water, electricity, and hard surfaces collide in 15 square feet. The compact nature means a fall inevitably involves impact with something hard or sharp.
Moisture-Resistant Installations
All baby-proofing devices in bathrooms must withstand constant humidity and occasional direct water contact. Adhesive-mounted items will fail within weeks. Prioritize mechanical fastening and materials like stainless steel or UV-resistant plastics. The toilet lid lock must be robust enough that a child can’t use the toilet as a step stool when it’s engaged—a common failure point in RV applications.
Plumbing-Specific Hazards
The water pump creates pressure surges that can cause faucets to drip if not fully closed, leading to slippery floors. Install spring-loaded faucet handles that return to off automatically. The water heater bypass valves, often located under benches or in cabinets, need locked access. Most critically, the black tank flush system should have a child-resistant cap and be clearly marked—this is a unique RV hazard with serious health implications.
Sleep Space Safety: Cribs and Beds on the Move
Creating a safe sleep environment in an RV challenges everything you know about nursery safety. The motion environment, space constraints, and multi-use areas require creative solutions.
Travel Crib Considerations
Standard pack ’n plays may not fit in RV sleeping areas, and their flexible frames can become pinching hazards during travel. Look for cribs specifically designed for marine or aviation use, with rigid frames that bolt down. The mattress must be secured to the base—additional friction is needed beyond gravity. If using a built-in bunk, install marine-style lee cloths or netting that can be deployed during travel, creating a secure cocoon that prevents ejection during sudden stops.
Multi-Functional Sleep Zones
Many road-schooling families convert dinettes or sofas to beds nightly. This requires daily baby-proofing resets. Create a checklist system where older children help verify that all pinch points are clear, latches are secure, and guardrails are properly positioned. This becomes part of the evening routine and a responsibility lesson. The bedding itself should be minimal—no loose pillows or heavy blankets that could shift and cover an infant’s face during travel days.
Electrical and Outlet Protection in RVs
RV electrical systems are hybrid beasts: 120-volt AC shore power, 12-volt DC battery systems, and sometimes inverted power. Each presents different risks, and they’re often intermingled in the same outlet banks.
Multi-Voltage Awareness
Your standard outlet covers work for 120-volt outlets, but what about the 12-volt USB ports, cigarette lighter outlets, and solar charge controllers? These low-voltage systems can still cause burns or sparks. Install covers on all outlets, regardless of voltage. For the 12-volt systems, look for covers that snap shut rather than slide, as vibration opens sliding covers. The inverter control panel needs a locking cover—curious button-pressing can drain batteries or create dangerous power fluctuations.
Cord Management in Motion
Extension cords and charging cables become tripping hazards and strangulation risks in tight quarters. Install retractable cable management systems or use industrial-strength Velcro to secure cords along walls, never across walkways. For road-schooling tech needs, create a dedicated charging station in a locked cabinet where tablets and laptops charge overnight, away from little hands. This also teaches device management as a life skill.
Stair and Entryway Solutions
RV entry steps are steep, often metal, and lack handrails appropriate for small children. The threshold creates a trip hazard, and the door itself can slam shut with wind or motion.
Step Modification Strategies
If your RV has factory steps, consider adding a detachable toddler rail system that anchors to the step frame. For towable RVs, portable plastic steps with built-in rails offer better stability. The key is ensuring the solution doesn’t interfere with the step’s ability to retract or fold. Add high-visibility tape to step edges—the dim lighting of dawn or dusk makes these edges invisible to toddling feet.
Door Dynamics
The screen door’s latch is typically at toddler eye level and easily opened. Install a top-mounted latch that requires adult height to operate. The main door’s pneumatic closer needs an adjustable pressure valve—set it to the minimum force necessary to close the door, preventing slam injuries. During travel, use a travel lock that secures the door in a partially open position; this prevents entrapment if you need to exit quickly while keeping the door from swinging wildly.
Temperature Control and Climate Safety
RVs experience temperature swings that would be unacceptable in traditional homes. A sunny day can turn your rig into an oven, while nighttime temperatures can plummet rapidly.
Ventilation Versus Security
Roof vents provide crucial airflow but become fall hazards when open. Install vent covers that allow airflow even when hatches are closed, or use interior safety nets under open vents. For windows, standard stops may not work on curved RV windows. Look for adjustable friction hinges that limit opening distance, or install custom-cut polycarbonate inserts that allow light and partial airflow while preventing a child from fitting through.
Heating Element Protection
RV furnaces, water heaters, and catalytic heaters get extremely hot with minimal clearance. Create physical barriers using perforated metal screens that allow airflow but prevent contact. These must be removable for maintenance and should be mounted with tamper-resistant fasteners. The thermostat needs a locking cover—children quickly learn that button controls temperature, and constant adjustments burn through propane and battery power.
Water Safety and Plumbing Considerations
Water in an RV is a finite resource pumped under pressure through visible pipes. Leaks happen frequently, and the water itself may be from questionable sources.
Fresh Water System Locks
The city water connection should have a locking cap when not in use—this prevents both contamination and creative water play. The fresh water tank fill port needs a child-resistant latch; climbing children can open these, causing spills that lead to slippery floors and water damage. Consider installing a master shut-off valve for the water pump in a locked compartment, giving you emergency control.
Gray and Black Tank Awareness
The valve handles for waste tanks are often accessible from outside, but some larger RVs have interior access points. These must be locked and clearly labeled with hazard symbols. Use this as a road-schooling biology lesson about waste management and environmental responsibility, but keep the actual handles physically inaccessible. The sewer hose storage compartment should have a locking latch—it’s both a contamination risk and a tempting tunnel for small explorers.
Outdoor Area Baby Proofing
Your outdoor space changes at every stop, from paved RV pads to wilderness sites. Creating consistent safety boundaries in inconsistent environments is the ultimate road-schooling challenge.
Campsite Hazard Assessment Protocol
Develop a systematic evaluation process for each new location that involves the whole family. Check for fire ant mounds, unstable trees, water features, and road traffic patterns. Create a laminated checklist that older children can lead. Establish a “safe zone” using portable fencing or natural boundaries, and make this the first setup task at every stop. This teaches situational awareness as a core life skill.
Outdoor Equipment Securing
Chairs, grills, and outdoor toys must be secured even when not in use—wind storms arise suddenly. Use spiral dog tie-out stakes to anchor lightweight furniture, and develop a “everything has a home inside” rule for travel days. The outdoor rug should have grommets and stakes to prevent it from becoming a trip hazard or sail. Your road-schooling curriculum can include meteorology lessons about sudden weather changes and why these precautions matter.
Emergency Preparedness for Road-Schooling Families
In a traditional home, emergency services know your address. In an RV, your location changes daily, and you may be hours from help. Your baby-proofing must include emergency access and communication.
Exit Strategy Drills
Practice emergency exits with all family members, including where to meet and how to account for everyone. For infants and toddlers, assign an older sibling or parent as a “buddy” who knows exactly how to extract them from their sleep space quickly. Keep an emergency hammer near each sleeping area—not for windows, which are often too small for escape, but for breaking through the emergency exit windows in the rear. These windows typically have red latches that children should learn to identify but not touch without permission.
Documentation and Communication
Create a laminated emergency card for each child with photos, medical information, and your current location updated daily. Store these in a consistent, known location. Your road-schooling journey should include lessons on what information to give a 911 operator, how to read campsite addresses, and how to describe your RV. Consider a GPS locator device that works off-grid for remote camping locations.
Creating Safe Learning Zones
Road-schooling requires dedicated spaces for focused learning, but these spaces overlap with living areas and must remain safe for younger siblings who aren’t yet participating in formal lessons.
Dynamic Space Management
Use portable, weighted room dividers to create temporary “classrooms” within the RV. These should be stable enough that a toddler can’t pull them down but light enough for older children to move. The learning zone should have its own baby-proofing subset: locking supply boxes, cord management for projectors or laptops, and a “safe floor” policy where only soft materials are allowed within the toddler zone.
Multi-Age Safety Integration
Your road-schooling curriculum likely includes science experiments, art projects, and tools that are dangerous for younger children. Create a color-coded system where supplies are marked by risk level and stored accordingly. This becomes a sorting and categorization lesson for elementary-aged children while keeping choking hazards and chemicals away from babies. The system must be visual and consistent, as grandparents or other relatives may visit and not understand verbal rules.
Maintaining Your Baby Proofing Systems
The most sophisticated baby-proofing fails if not maintained. The RV environment accelerates wear on every component through vibration, temperature cycling, and constant use.
Inspection Schedules
Create a monthly inspection routine that coincides with other maintenance tasks like checking tire pressure and propane levels. Test every latch by applying force in the direction of travel. Check all mounting screws for torque—vibration loosens them over time. Look for plastic components that have become brittle from UV exposure or cold. Make this a family maintenance day where older children learn mechanical inspection skills.
Evolution as Your Child Grows
Baby proofing isn’t static. Your crawler’s needs differ from your toddler’s, which differ from your preschooler’s. Every six months, reassess from your child’s current developmental stage. The road-schooling advantage is that your child learns alongside you—at two, they learn “hot” and “stop”; at four, they help check latches; at six, they understand the physics of why these systems exist. This progressive responsibility builds genuine safety competence, not just rule-following.
Teaching Safety as Part of Road-Schooling Curriculum
The ultimate baby-proofing strategy isn’t physical barriers—it’s education. Road-schooling families have the unique opportunity to make safety a living curriculum that evolves with your child’s understanding.
Age-Appropriate Safety Lessons
For infants, it’s about environmental control. For toddlers, introduce simple concepts through songs and stories about RV safety. Preschoolers can help with daily checklists and begin learning about cause and effect. School-aged children should understand the systems: how propane works, why electrical loads matter, what to do in weather emergencies. This isn’t just about keeping the baby safe; it’s about raising a capable, aware human who understands their environment.
Modeling Risk Assessment
Narrate your safety decisions: “I’m locking this cabinet because the cleaner inside could hurt you if swallowed, and I want you to stay healthy for our hike tomorrow.” This turns baby proofing from mysterious parental rules into logical consequences. When you arrive at a new campsite, make the hazard assessment a family discussion. This teaches critical thinking and situational awareness—arguably more valuable than any workbook lesson.
Frequently Asked Questions
At what age should I start baby proofing my RV?
Begin during pregnancy, but approach it developmentally. Install structural items like furniture anchors and cabinet locks before birth. Add outlet covers and door latches when your baby becomes mobile around 6-8 months. The key is anticipating the next milestone rather than reacting to it. Road-schooling families should have core systems in place before the first trip, as you’ll be too busy adapting to travel life to retrofit safety later.
How is RV baby proofing different from house baby proofing?
The critical difference is motion. House baby proofing assumes a static environment; RV proofing must withstand forces from all directions during travel. Walls can’t support standard anchors, spaces serve multiple functions, and hazards change based on location. Additionally, RVs contain systems like propane and holding tanks that don’t exist in traditional homes. The baby-proofing must be more robust, more flexible, and integrated into travel routines rather than one-time installations.
Can I use regular baby proofing products in an RV?
Some residential products work, but most require modification or reinforcement. Adhesive-mounted items fail quickly due to temperature extremes and vibration. Plastic components become brittle. Magnetic locks may not hold during travel. Prioritize mechanically fastened, metal components designed for marine or automotive applications. Test every product by shaking it vigorously and applying force in multiple directions. If it feels flimsy in your hands, it will fail on the road.
How do I secure furniture that needs to move or convert?
Focus on positive-locking mechanisms that require deliberate release. For dinettes that convert to beds, use marine-grade barrel bolts that slide into receivers on both sides. For removable furniture, create designated travel storage where items are physically prevented from movement using cargo nets or ratchet straps anchored to wall studs. The principle is: if it’s not bolted down, it’s stored in a way that immobilizes it completely. Never rely on friction or gravity alone.
What are the biggest RV-specific hazards for mobile babies?
The top three are projectiles during travel, entrapment in slide-out mechanisms, and access to unique RV systems like propane valves and waste tanks. Additionally, the threshold between living area and cab, exterior doors that lead directly to roads, and the rapid temperature swings in vehicles pose risks not found in houses. The confined space also means any hazard is within constant reach, eliminating the “out of sight, out of mind” safety buffer.
How do I handle baby proofing at campgrounds and RV parks?
Develop a portable baby-proofing kit for outdoor spaces including temporary fencing, stake-down systems for outdoor rugs, and a site evaluation checklist. Teach children to identify hazards like fire rings, lake access, and road traffic. Some families use a brightly colored rope to define the “safe zone” perimeter. The key is consistency in your evaluation process and clear boundaries that children can understand, even when the environment changes.
Should I baby proof differently for travel days versus stationary living?
Absolutely. Travel days require maximum security—everything locked, everything stored, redundant systems engaged. Stationary living allows for more accessibility, with some locks disengaged and learning materials more available. Create a “travel day checklist” that’s as routine as hitching up. This includes locking all cabinets, securing all items, engaging travel locks on doors, and double-checking propane and electrical shut-offs. Make this transition a family ritual that older children manage.
How can I maintain a minimalist lifestyle while baby proofing?
Baby proofing and minimalism actually complement each other. The fewer items you have, the fewer projectiles and hazards exist. Focus on multi-functional safety equipment: a cabinet lock that’s also a learning tool about mechanics, a safety gate that doubles as a room divider for school time. Invest in quality over quantity—one robust locking system is better than three failed adhesive attempts. The road-schooling philosophy of experiential learning aligns with having less stuff and more secure, meaningful interactions with your environment.
What documentation should I have for emergency situations?
Maintain a digital and physical emergency folder. Include photos of each child, medical information, insurance cards, and a daily-updated location log with campsite addresses and coordinates. List your RV’s specifications—make, model, license plate, and VIN—since emergency services may need this information. Create a one-page “RV emergency” sheet that explains your systems to first responders. Store copies in your tow vehicle, RV, and with a trusted relative who isn’t traveling with you.
How do I teach my older road-schooled children about RV safety?
Integrate safety into your curriculum systematically. For elementary ages, make it hands-on: they help install locks, check torque on bolts, and lead campsite evaluations. Middle schoolers can learn the physics of motion and forces, calculate load capacities, and understand the chemistry of propane. High schoolers should be able to fully baby-proof the RV themselves and teach the principles to others. This creates true competence, not just compliance, and prepares them for independent travel later in life.