Creating the perfect sleep sanctuary for your little one doesn’t have to drain your wallet. As any sleep-deprived parent will tell you, controlling light in your baby’s nursery is one of the most effective ways to encourage longer, more restorative sleep cycles. While custom blackout curtains can cost hundreds of dollars, blackout stickers have emerged as a game-changing solution that delivers impressive darkness for less than the price of a pizza.
These innovative films transform ordinary windows into light-blocking barriers within minutes, helping establish healthy sleep patterns during those crucial early months when melatonin production is still developing. But not all budget-friendly options are created equal. Understanding what separates effective blackout stickers from disappointing duds can mean the difference between blissful two-hour naps and frustrating 20-minute catnaps. Let’s dive into everything you need to know to make an informed decision for your nursery.
Top 10 Black-Out Stickers for Nursery Windows
Detailed Product Reviews
1. rabbitgoo Blackout Window Film, Sun Heat Blocking Privacy Cover for Glass, Removable Opaque Room Darkening Dark Black Out Window Covers Tint Shades for Home Day Sleep Light Blocker 17.5 x 78.7 Inches

Overview: This static cling blackout film offers an affordable, glue-free solution for creating darkness. At 17.5 x 78.7 inches, it’s designed for small to medium windows, making it ideal for shift workers and nurseries. The removable design allows for easy application and repositioning without permanent alterations to rental properties.
What Makes It Stand Out: The static cling technology eliminates messy adhesives, using only soapy water for installation. It blocks 100% of UV rays while providing complete opacity when properly applied edge-to-edge. Unlike fabric alternatives, this vinyl film creates a sleek, low-profile look that integrates seamlessly with modern interiors without adding bulk.
Value for Money: At $5.99, this is the most budget-friendly option, costing just $0.62 per square foot. It’s significantly cheaper than magnetic or hook-and-loop alternatives while delivering comparable light blocking. For renters or temporary needs, the reusability adds exceptional value, though multiple rolls may be needed for larger windows.
Strengths and Weaknesses: Pros:
- Extremely affordable and reusable
- Glue-free static cling application
- 100% UV protection
- No permanent installation
Cons:
- Requires precise edge sealing to prevent light leaks
- Not suitable for double-pane windows (risk of cracking)
- Smaller coverage area per roll
- May bubble if not installed carefully
Bottom Line: Perfect for budget-conscious buyers needing temporary, effective darkness without drilling or adhesives.
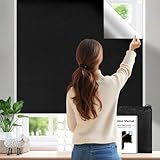
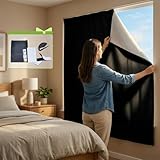
2. BKSAI 100% Blackout Window Cover, Portable Magnetic Black Out Curtains for Window, Black Out Shades No Drill Cuttable Blackout Blinds for Bedroom, RV, Nursery, Media Room, 79x57 inch

Overview: This magnetic blackout curtain uses premium 420D Oxford fabric to deliver complete darkness across a 79x57 inch window. The tool-free magnetic installation system makes it ideal for renters, RV owners, and media rooms. Its cuttable design accommodates various window shapes while providing thermal insulation benefits for year-round comfort.
What Makes It Stand Out: The innovative magnetic attachment system uses no-trace adhesive magnets that won’t damage frames, allowing for instant setup and removal. The durable 420D Oxford fabric withstands wear and tear better than thinner alternatives. Thermal insulation properties help reduce cooling costs by blocking solar heat gain, making it both functional and energy-efficient for hot climates.
Value for Money: At $23.99, this mid-range option offers excellent durability and reusability. The magnetic system justifies the higher price compared to adhesive films, providing superior convenience for frequent removal. While more expensive than static cling options, the fabric construction and thermal benefits deliver long-term value, especially for permanent installations.
Strengths and Weaknesses: Pros:
- 100% blackout with durable Oxford fabric
- Tool-free magnetic installation
- Thermal insulation reduces energy costs
- Customizable size and shape
Cons:
- Black-silver color may not suit all decor
- Thinner than traditional curtains
- Fold creases affect aesthetics
- Higher price point than adhesives
Bottom Line: An excellent choice for those prioritizing durability and easy installation in a fabric-based solution.
3. 100% Blackout Shades Curtains for Bedroom 57x 79Inch,No Drill,Portable,DIY Cut,Removable,Black Out Blinds Window Cover for Baby Nursery,RV,Media Room,Hook Loop Tape Straps Stickers,Magnetic Clips

Overview: This versatile blackout curtain combines Oxford cloth with a reflective silver coating to block 100% of light across a 57x79 inch area. The ultra-thin 0.0045-inch profile makes it exceptionally portable for travel and temporary use. Hook-and-loop tape with nano-adhesive stickers and magnetic clips provide multiple mounting options without drilling or tools.
What Makes It Stand Out: The paper-thin design folds down to nearly nothing, making it perfect for travelers and RV enthusiasts. The comprehensive installation kit includes 36 pairs of adhesive strips, 3 magnetic clip sets, and a tape measure—more accessories than competitors. Silver coating reflects heat while blocking UV rays, offering dual functionality in a featherweight package.
Value for Money: At $17.99, this offers exceptional value with its extensive accessory package and portability. The ultra-thin design sacrifices some aesthetic appeal but delivers unmatched convenience for temporary or mobile use. It’s cheaper than magnetic alternatives while providing similar blackout performance and more installation flexibility across diverse window types.
Strengths and Weaknesses: Pros:
- Ultra-thin and highly portable
- Extensive installation accessories included
- Heat-reflective silver coating
- Versatile mounting options
Cons:
- Creases from packaging affect appearance
- Thinner than traditional curtains
- May need pairing with curtains for aesthetics
- Silver coating side must face outward
Bottom Line: Ideal for travelers and renters seeking maximum portability with comprehensive installation options.
4. 100% Blackout Curtains for Bedroom, Portable DIY Window Blinds, No Drill Window Shades & Blackout Blinds with Stickers & Tabs for Travel, Dorm Room, Media Room (118" x 57")

Overview: This extra-wide blackout curtain spans 118 x 57 inches, making it suitable for large windows or patio doors. The high-quality fabric with silver backing blocks all light and UV rays effectively. Nano-adhesive stickers and Velcro tabs enable tool-free installation in under 10 minutes, while the foldable design supports travel and temporary use scenarios.
What Makes It Stand Out: The generous dimensions cover larger windows that most competitors can’t handle in a single panel. The straightforward “measure, cut, connect” process simplifies DIY installation for beginners. Included storage bag enhances portability. The manufacturer provides clear guidance on odor dissipation and crease removal, demonstrating attention to user experience.
Value for Money: At $19.97 for nearly double the width of standard options, this offers excellent coverage per dollar. The 118-inch length eliminates the need to purchase multiple panels for wide windows. While slightly pricier than budget options, the size versatility and included storage bag justify the cost for those with larger windows or doors.
Strengths and Weaknesses: Pros:
- Extra-wide 118-inch coverage
- Simple 10-minute installation
- Includes storage bag for portability
- Clear maintenance instructions provided
Cons:
- Initial odor requires airing out
- Creases need ironing before use
- May be too large for small windows
- Fewer accessories than some competitors
Bottom Line: Best for covering large windows or doors with a single, portable blackout solution.
5. 100% Blackout Curtains for Bedroom 57x118 inch,Removable Cuttable No Drill Blackout Shades,Portable Temporary Black Out Window Cover,Black Out Blinds for Nursery,Dorm,Travel,RV or Renter Use

Overview: This budget-friendly blackout curtain delivers 100% light blocking in a generous 57x118 inch size. Made from 420D Oxford fabric with heat-reflective silver coating, it targets renters, travelers, and nursery owners. The cuttable design accommodates various window shapes, while upgraded heat-resistant hook-and-loop stickers ensure reliable adhesion even in hot summer conditions.
What Makes It Stand Out: The heat-resistant adhesive formula addresses a common failure point in similar products, preventing curtain detachment during summer heat. At under $10, it’s the most affordable fabric option while maintaining premium 420D construction. The silver coating reflects infrared heat, providing better temperature control than aesthetic-focused curtains.
Value for Money: At $9.99, this represents exceptional value—combining large dimensions, durable fabric, and thermal benefits at a budget price point. It’s significantly cheaper than magnetic alternatives while offering similar performance. The upgraded adhesives eliminate the need for frequent replacements, saving money long-term and reducing frustration.
Strengths and Weaknesses: Pros:
- Unbeatable price for fabric construction
- Heat-resistant adhesive prevents summer failures
- Reflective coating for temperature control
- Large coverage area
Cons:
- Thin profile may have aesthetic limitations
- Packaging creases require ironing
- May need pairing with traditional curtains
- Hook-and-loop less convenient than magnets
Bottom Line: The best budget fabric option with reliable performance and superior heat-resistant adhesion.
6. Keeswin Blackout Blinds Curtains for Bedroom, 39 x 57 Inch Portable DIY Blackout Shades Stickers, No Drill Blinds for Window, Baby Nursery, Bedroom and Travel
Overview: The Keeswin Blackout Blinds deliver a remarkably affordable portable darkness solution. At 39 x 57 inches, these DIY shades use thick Oxford fabric with a reflective silver coating to achieve complete light blockage. Designed for tool-free installation, they serve travelers, renters, and parents establishing sleep-friendly nurseries without permanent modifications.
What Makes It Stand Out: The $9.99 price point makes this the most accessible blackout option available. The upgraded adhesive system includes 26 strong tape pieces that promise residue-free removal and reusability—critical advantages over disposable alternatives. Its compact size and included portable bag enable true travel convenience, fitting easily in luggage.
Value for Money: Exceptional. Comparable temporary solutions cost 50-150% more. The reusability factor transforms it into a long-term investment, particularly valuable for frequent travelers or those with multiple small windows. Achieving 100% blackout at this price demonstrates impressive engineering.
Strengths and Weaknesses: Strengths include unbeatable affordability, genuine portability, reliable adhesive performance, and simple three-step installation. The fabric effectively reduces heat transfer. Weaknesses: the modest dimensions may prove insufficient for standard windows, necessitating multiple purchases. Adhesive longevity diminishes with repeated reapplications, and achieving edge-seal perfection requires careful cutting technique.
Bottom Line: Ideal for budget-conscious buyers prioritizing portability and temporary darkness. While size constraints limit whole-room applications, its combination of price, performance, and convenience makes it the perfect entry-level choice for travel, small windows, and nursery use.
7. RUseeN ULIGOOD Portable Blackout Shades (118" x 57") Travel Window Blackout Curtains, 100% Blackout Material Temporary Blackout Blinds for Baby Nursery, Bedroom, Caravan, Office or Travel Use

Overview: RUseeN ULIGOOD Portable Blackout Shades provide expansive 118" x 57" coverage for larger window applications. Constructed from thick, soft-touch fabric with a silver-grey coating, these curtains deliver complete sunlight and UV blockage. The design serves homeowners, renters, and caravan enthusiasts seeking temporary yet robust light control solutions.
What Makes It Stand Out: The generous dimensions accommodate full-length windows and sliding doors that smaller competitors cannot effectively cover. Thirty adhesive recycle tapes supply superior holding power, while the included ruler ensures accurate customization. The lightweight yet durable construction balances portability with performance, making it practical for both residential and travel scenarios.
Value for Money: At $21.99, it occupies the mid-range segment. The extensive coverage often eliminates need for multiple purchases, providing better economics than cheaper, smaller alternatives. For frequent travelers and RV owners, the reusability justifies the premium over disposable options.
Strengths and Weaknesses: Strengths include impressive size versatility, strong adhesive count, comprehensive accessory kit, and true portability. The fabric quality noticeably reduces heat infiltration. Weaknesses: the higher price may deter budget shoppers, and adhesive performance on textured or dirty surfaces proves inconsistent. Achieving perfect edge seals on irregular windows requires patience and skill.
Bottom Line: A superior choice for those requiring maximum coverage flexibility. The size advantage makes it particularly valuable for larger windows, RVs, and temporary room darkening. While pricier than basic models, the quality construction and reusability deliver compelling long-term value.
8. rabbitgoo Total Blackout Window Film Sun Blocking, Black Privacy Window Film Light Blocker, Stained Glass Thermal Cling Heat Control, Room Darkening Glass Sticker for Door Covering, 17.5" x 78.7"

Overview: rabbitgoo Total Blackout Window Film employs static cling technology rather than adhesive, offering a unique approach to light control. Measuring 17.5" x 78.7", this PVC film blocks light and ensures privacy without permanent installation. It specifically targets renters and those seeking semi-permanent room darkening without surface damage.
What Makes It Stand Out: The glue-free static cling eliminates adhesive failure risks and surface damage concerns completely. Installation requires only water, and removal leaves absolutely zero residue. At $6.39, it represents the most budget-conscious blackout solution available, costing less than a coffee.
Value for Money: Outstanding for targeted applications. The price per square foot remains competitive, and the reusable nature adds significant value. However, the narrow width severely limits practicality for standard windows, often requiring multiple rolls and creating potential light leaks at seams.
Strengths and Weaknesses: Strengths include effortless application, guaranteed residue-free removal, effective heat control, and UV protection. The static cling performs reliably on smooth glass surfaces. Weaknesses: the 17.5" width is impractical for most windows, it’s not truly portable like fabric alternatives, and seams between sheets inevitably leak some light. Durability falls short of fabric competitors.
Bottom Line: Perfect for small, smooth windows where temporary darkness is needed without adhesive risks. Ideal for renters with modification restrictions. While unsuitable as a whole-home solution, it excels as an ultra-cheap, targeted option for bathrooms, sidelights, or small bedroom windows.
9. Black Out Window Cover 79" x 57",Cuttable Blackout Curtains for Bedroom,Heat Insulation and Light Blocking Blackout Shades,Portable Black Out Blinds Curtains with Stickers for Windows Nursery Theater
Overview: This Black Out Window Cover establishes itself as a premium solution using heavyweight 420D Oxford cloth with reinforced silver coating. Measuring 79" x 57", it promises complete light elimination plus advanced thermal insulation. The comprehensive accessory kit targets performance-focused users who prioritize quality over minimal cost.
What Makes It Stand Out: The thermal insulation capability—blocking 99% UV rays and reducing heat transfer by 70%—surpasses standard blackout products significantly. The dual fastening system (nano stickers or Velcro) provides installation flexibility, while Velcro tabs enable adjustable openings. The inclusion of a precision cutter and measuring tools demonstrates exceptional user experience consideration.
Value for Money: At $18.98, it offers reasonable pricing for the premium feature set. The heavy-duty fabric and thermal benefits justify the cost over basic models. For energy-conscious consumers or those in hot climates, potential cooling cost savings enhance its overall value proposition substantially.
Strengths and Weaknesses: Strengths include superior fabric durability, outstanding thermal performance, complete installation kit, and versatile fastening options. Residue-free removal works reliably. Weaknesses: the dimensions are smaller than some competitors, the Velcro system may be unnecessary for simple applications, and the heavier fabric reduces portability slightly. The 18 nano stickers may prove insufficient for larger custom cuts.
Bottom Line: Best suited for users requiring both darkness and temperature control. The premium materials and thoughtful accessories make it ideal for bedrooms, home theaters, and hot climates. While neither cheapest nor largest, its performance capabilities fully justify the moderate price premium.
10. GLICPIX 100% Blackout Blinds with Stickers 118" x 59" Blackout Curtains for Bedroom Window Blinds No Drill Thermal Insulated and Block UV for Bedroom,Baby Nursery, RV,Media Room or Travel, Black

Overview: GLICPIX 100% Blackout Blinds provide expansive 118" x 59" coverage emphasizing simplicity and effectiveness. Utilizing latest-generation silver-coating technology on polyester fabric, these shades block all sunlight and UV rays. The hook-and-loop fastener system targets users seeking reliable, tool-free installation across varied surfaces.
What Makes It Stand Out: The hook-and-loop fastener approach delivers more consistent adhesion than traditional tapes, particularly on textured surfaces. Generous dimensions accommodate most window types, while the included cutting knife and ruler enable straightforward DIY customization. The storage bag enhances portability for travel or seasonal storage needs.
Value for Money: At $15.99, it undercuts many competitors while offering premium features. The large size enables single-purchase coverage for most applications, delivering superior economics compared to smaller alternatives requiring multiple units.
Strengths and Weaknesses: Strengths include reliable hook-and-loop adhesion, excellent size-to-price ratio, effective thermal insulation, and versatile surface compatibility. The silver-coating technology achieves reliable 100% blackout. Weaknesses: only 10 fasteners may prove inadequate for full perimeter sealing, initial odor requires off-gassing time, and polyester fabric feels less premium than Oxford cloth alternatives. Some users may find the fastener system less sleek than adhesive strips.
Bottom Line: A well-balanced option for those wanting maximum coverage without maximum spending. The hook-and-loop system provides installation confidence, while the size handles most residential windows. Despite minor drawbacks like initial odor, it delivers strong performance and exceptional value for bedrooms, nurseries, and RV applications.
What Are Blackout Stickers and Why They’re Perfect for Nurseries
Blackout stickers are specialized window films designed to block or significantly reduce incoming light. Unlike traditional adhesive decals, modern versions use either static cling technology or light-tack adhesives that stick directly to glass surfaces. For nursery applications, they offer an unbeatable combination of affordability, effectiveness, and flexibility that permanent solutions simply can’t match.
The beauty of these products lies in their simplicity. You can apply them in minutes without tools, remove them without damaging surfaces, and even reuse them as your needs change. This makes them particularly valuable for renters, parents who travel frequently, or anyone wanting to test light-blocking solutions before committing to more expensive window treatments.
The Science Behind Static Cling vs. Adhesive Backing
Static cling films rely on natural static electricity and a smooth backing to adhere to glass. They work best on perfectly clean, flat surfaces and can be repositioned infinitely. However, they may lose their grip in extremely dry conditions or on windows with microscopic texture. Adhesive-backed options use a light pressure-sensitive glue that’s specifically formulated for easy removal. These typically provide better edge sealing and stay put longer, but require more careful application since initial placement matters.
For nurseries, adhesive-backed films often edge out static cling versions because they create a tighter seal that prevents light leaks around the edges—those tiny slivers of brightness that can disrupt sleep. Look for “removable” or “repositionable” adhesives rather than “permanent” or “semi-permanent” to protect your window frames.
Understanding Infant Sleep: Why Darkness is Non-Negotiable
Babies aren’t born with mature circadian rhythms. Their internal clocks develop gradually over the first 3-4 months of life, and darkness plays a pivotal role in this process. When light hits a baby’s eyes, it suppresses melatonin production—the hormone responsible for signaling “sleep time” to the brain. Even small amounts of ambient light during daytime naps can confuse these developing systems.
Research consistently shows that infants sleep longer in darker environments. One study found that babies in rooms with light-blocking window treatments slept an average of 30-45 minutes longer per nap session. Over a day, that adds up to nearly two additional hours of sleep—the difference between a contented baby and an overtired, fussy one.
Circadian Rhythm Development in Babies
Your newborn’s internal clock is essentially blank at birth. Environmental cues—especially light and darkness—teach their brain when to be alert and when to rest. By creating pitch-dark conditions for sleep times, you’re providing a clear, consistent signal that accelerates this learning process. Blackout stickers help establish this darkness on demand, regardless of whether it’s high noon or 6 PM during daylight saving time.
The Role of Melatonin Production
Melatonin isn’t just about sleepiness; it’s a powerful antioxidant that supports brain development. Infant melatonin levels naturally rise in darkness and fall with light exposure. Even a nightlight that seems dim to adult eyes can cut melatonin production by over 50% in babies. Quality blackout stickers eliminate this concern entirely, ensuring your little one gets the full developmental benefits of uninterrupted melatonin cycles.
The $15 Budget Sweet Spot: What You Can Realistically Expect
Fifteen dollars represents a fascinating price point in the blackout sticker market. It’s enough to access decent quality materials and effective light blocking, but low enough that you’ll need to manage expectations about longevity and premium features. At this price, you’re typically looking at single-window coverage kits rather than multi-room packages.
Most under-$15 options provide enough material to cover a standard 24x36 inch nursery window completely. Some kits include multiple smaller sheets for divided windows, while others offer one large piece you can trim yourself. The key is understanding that you’re prioritizing function over fancy packaging or brand names.
Price vs. Quality: Finding the Balance
The cheapest blackout stickers (under $8) often use thinner vinyl that may curl at the edges within weeks. They might block 85-90% of light—good enough for evening use but insufficient for bright daytime naps. The $12-15 range typically upgrades you to thicker materials, better adhesives, and more complete light blocking. This is where you’ll find products that truly deliver “blackout” performance rather than just “room darkening.”
What Drives Cost in Blackout Solutions
Material thickness measured in mils (thousandths of an inch) is the primary cost factor. A 6-mil film costs manufacturers significantly more than a 2-mil version. Reusability features like protective backing sheets also add expense. At the under-$15 price point, expect 4-6 mil thickness and basic reusability—enough for several applications but not indefinite reuse.
Key Features That Define Quality Budget Blackout Stickers
When evaluating options, focus on measurable attributes rather than marketing claims. A truly effective blackout sticker should block at least 98% of visible light. Look for this specification in product descriptions. If it’s not listed, that’s a red flag.
Opacity ratings tell you how much light penetrates the material itself, but edge sealing determines real-world performance. The best budget options feature slightly oversized dimensions so you can extend past the window frame, preventing those pesky light leaks that sneak around the edges.
Material Thickness and Density
Hold the sticker up to a bright light source. If you can see the outline of the bulb, it’s not dense enough. Quality blackout stickers at this price point should feel substantial—like a thick cardstock rather than flimsy cling wrap. The material should also be opaque from both sides; some cheaper versions have reflective backing that works one-way but looks unsightly from outside.
UV Protection Capabilities
Many parents don’t realize that effective blackout stickers also block harmful UV rays—often up to 99%. This protects your nursery furniture from fading and provides an extra layer of sun protection for your baby’s delicate skin during diaper changes near windows. Check for UV-blocking claims, as this adds significant value without increasing cost.
Reusability Factor
The ability to remove and reapply stickers matters more than you might think. Maybe you’re moving, redecorating, or want to use them during summer months only. Quality budget options should allow at least 3-5 reapplications without losing adhesion. Look for products that mention “repositionable” or include protective backing sheets for storage.
Measuring Your Nursery Windows Like a Pro
Precision measurement separates successful installations from frustrating do-overs. Start by measuring the visible glass area, then add 1-2 inches on each side. This overlap is crucial for blocking edge light. For windows with frames deeper than 1 inch, measure to the outer edge of the frame for maximum darkness.
Don’t forget to account for window hardware. Crank handles for casement windows or central locks on double-hung styles will require cutouts. It’s better to trim around these after application rather than trying to pre-cut precise holes.
Standard Nursery Window Sizes
Most nursery windows fall into three categories: 24x36 inches (single-hung), 30x36 inches (double-hung), or 36x48 inches (picture windows). Measure yours to confirm, but knowing these standards helps you evaluate whether a product offers enough material. Many under-$15 kits are sized for the 24x36 standard, requiring creative placement on larger windows.
Accounting for Frame Coverage vs. Glass Only
Applying stickers to the frame itself creates superior light blocking compared to glass-only application. Paint-safe adhesives allow this approach, but test a small area first. For deep frames, you might need to cut the film into sections that cover both glass and frame interior, essentially creating a light-blocking border.
The Overlap Method for Maximum Darkness
For divided windows with muntins (the strips dividing panes), apply one large sheet across the entire window rather than individual pieces per pane. This eliminates light leaks at the muntins and creates a smoother overall appearance. Use a sharp utility knife to trim excess material after application, scoring along the muntin edges for clean lines.
Installation Mastery: Step-by-Step Guide
Successful installation begins with surface prep. Clean the window glass with isopropyl alcohol, not just glass cleaner. Alcohol removes residues that interfere with adhesion. Wait until the surface is completely dry—any moisture trapped underneath will create bubbles and weaken the bond.
Work in a dust-free environment. Turn off ceiling fans and HVAC vents temporarily to prevent airborne particles from landing on your adhesive. Cut your sticker slightly larger than needed; you can always trim excess, but you can’t add material once it’s cut too small.
Surface Preparation Techniques
Beyond cleaning, consider the temperature. Apply stickers when the window glass is between 60-80°F. Cold glass can cause adhesives to stiffen and not stick properly, while hot glass may activate adhesives too quickly, preventing repositioning. Early morning or evening installations often work best for temperature control.
The Wet vs. Dry Application Debate
Dry application offers immediate adhesion and is simpler for small windows. Wet application—spraying a light soap solution on the glass first—allows for repositioning and bubble-free results on larger surfaces. For nursery windows under 24x24 inches, dry application is fine. For anything larger, the wet method reduces frustration significantly. Just be sure to squeegee out all solution to prevent edges from lifting.
Bubble Removal and Smoothing Tricks
Start from the center and work outward using a plastic squeegee or credit card wrapped in a soft cloth. For stubborn bubbles, prick them with a fine pin and press out the air. Small bubbles often disappear on their own within 24-48 hours as the adhesive cures. Never use metal tools directly on the film—they can scratch the surface and create weak spots.
Adhesive Safety: Protecting Your Walls and Window Frames
Not all adhesives are nursery-safe. Look for water-based acrylic adhesives rather than solvent-based ones. Water-based formulas emit minimal VOCs (volatile organic compounds) and won’t off-gas harmful chemicals into your baby’s breathing space. They should carry certifications like GREENGUARD Gold or be explicitly labeled “non-toxic” and “phthalate-free.”
The removability window matters too. Quality adhesives should stay secure for 6-12 months but remove cleanly within that timeframe. After a year, even removable adhesives can bond permanently, especially in hot, sunny conditions. Mark your calendar to remove and replace them annually if you’re in a warm climate.
Understanding Removable vs. Permanent Adhesives
Removable adhesives are designed for clean removal within a specific timeframe, usually up to one year. They leave no residue and won’t pull paint. Permanent adhesives create a lasting bond and may damage surfaces upon removal. For nurseries, removable is non-negotiable—you might want to redecorate or move, and damaged walls create safety hazards from paint chips.
Paint-Safe Formulations for Nursery Walls
If you’re applying stickers to painted window frames, test first on an inconspicuous area. Press a small piece firmly, wait 24 hours, then remove. If paint comes off, the adhesive is too aggressive. Quality options designed for home use should pass this test on most eggshell, satin, or semi-gloss paints. Flat/matte paints are more vulnerable and may require glass-only application.
The 30-Day Test: What to Watch For
After 30 days of use, inspect the edges. Lifting indicates poor adhesion or incompatible surfaces. Yellowing suggests UV degradation—quality films should remain color-stable. Any odor (beyond a mild “new product” smell that dissipates in days) means VOCs are present and the product isn’t nursery-safe. Remove immediately if you detect chemical smells.
Light Blocking Levels Decoded
Manufacturers use terms loosely, but there’s a clear hierarchy. “Light filtering” reduces glare but leaves the room clearly lit. “Room darkening” blocks 70-90% of light, creating a dim but not dark environment. “Blackout” should mean 98%+ light blockage, achieving near-total darkness even at noon.
The difference matters enormously for naps. A room-darkening film might work for a newborn who can sleep anywhere, but a 6-month-old learning sleep associations needs true blackout conditions. Don’t settle for vague claims—look for specific percentage ratings.
Blackout vs. Room Darkening vs. Light Filtering
True blackout stickers use multiple layers: a light-absorbing core sandwiched between protective films. Room-darkening versions are simply tinted or coated single layers. You can test this by holding a flashlight directly against the material. If you see any light penetration, it’s not true blackout. This distinction is critical for nursery use where every lumen counts.
The “Pinprick Test” for Assessing Quality
In a dark room, shine a bright flashlight through the sticker material onto a white wall. Any pinpricks of light indicate manufacturing defects or insufficient density. Quality control at the under-$15 price point can be inconsistent, so test before installation. Finding one or two tiny holes isn’t a dealbreaker—you can cover them with a small piece of electrical tape on the backside.
Edge Gaps: The Silent Sleep Disruptor
Even the best blackout film fails if installed poorly. A 1/8-inch gap around the edge can let in enough light to cast shadows and stimulate wakefulness. The solution? Apply stickers to the frame, not just the glass. For windows where frame application isn’t possible, create a light-blocking border using black electrical tape or craft foam strips placed behind the sticker edges.
Nursery Safety Standards You Must Know
Safety trumps all other considerations. The product should meet CPSC (Consumer Product Safety Commission) standards for children’s products, even though window films aren’t technically toys. Look for ASTM D4236 certification, which means the materials have been evaluated for toxicity by a qualified toxicologist.
Fire safety is another overlooked factor. All window coverings in a nursery should meet NFPA 701 standards for flame propagation. While most blackout stickers are vinyl-based and inherently flame-retardant, cheaper versions may use plasticized materials that melt and drip when exposed to heat, creating burn hazards.
Non-Toxic Certifications to Look For
Beyond basic “non-toxic” claims, reputable products carry specific certifications. OEKO-TEX Standard 100 means the material has been tested for harmful substances. CPSIA compliance indicates adherence to strict lead and phthalate limits. GREENGUARD Gold certification ensures low chemical emissions. At the under-$15 price point, finding all three is rare, but any one of them provides reasonable assurance of safety.
Fire Retardancy and Nursery Applications
Check the fine print for fire ratings. Class A fire rating (or Class 1) indicates the highest level of flame resistance. While all vinyl will eventually melt at high temperatures, Class A materials self-extinguish when the flame source is removed. This provides precious seconds in an emergency and prevents a small incident from becoming a major fire.
Choking Hazard Considerations
Once applied, blackout stickers present minimal choking risk. However, during installation, you’ll trim excess material. Those small pieces can be attractive to curious toddlers. Install during nap time or when older siblings are safely occupied. Immediately dispose of trimmings in a sealed container. Some parents keep a small vacuum handy to suck up pieces as they cut, ensuring nothing hits the floor.
Design Options That Go Beyond Basic Black
Gone are the days when blackout meant unattractive black squares. Modern budget options include star patterns, moon phases, and subtle textures that add visual interest without compromising function. Some feature white or light-colored exterior faces that reflect heat and maintain curb appeal, while the interior remains dark.
Consider double-sided designs where one side is decorative and the other is plain black. This gives you flexibility to flip them based on season or room changes. During winter, the black side faces out to absorb heat; in summer, the reflective side outward keeps the room cooler.
Patterns and Prints That Stimulate by Day
Strategic patterns can serve dual purposes. A subtle constellation design blocks light effectively while providing a point of interest during awake times. Some parents use glow-in-the-dark star patterns that charge during the day and provide a comforting nightlight effect after lights-out—though this defeats the blackout purpose if too bright.
Double-Sided Designs for Versatility
The best budget options feature different colors on each side. Black interior for sleep, white exterior for HOA compliance and heat reflection. This effectively gives you two products in one, extending value beyond the initial purchase. When applying, mark the top edge clearly so you install with the correct side facing the right direction.
Customizable Options for Creative Parents
Plain black stickers become canvases for creativity. Use a white paint pen to add your baby’s name or a simple design. Apply removable wallpaper over sections to create patterns. Some crafty parents cut shapes into the film (leaving a backing layer intact) to create subtle light patterns that aren’t disruptive but add personality. Just keep any cutouts minimal—remember the goal is darkness.
Maintenance and Cleaning for Longevity
Dust accumulation on blackout stickers is inevitable, especially in nurseries where air circulation may be reduced. Dirty films not only look unsightly but can also reduce effectiveness over time as dust particles create microscopic gaps. Gentle cleaning every 2-3 weeks maintains performance.
Never use ammonia-based cleaners like Windex—they can break down adhesives and cause edges to lift. Instead, use a microfiber cloth slightly dampened with water. For stubborn spots, a drop of mild baby shampoo in water works safely. Always wipe in one direction, never circular motions, which can create static and attract more dust.
Dust and Grime Removal Techniques
Start with dry dusting using a Swiffer or similar static duster. This removes surface particles without moisture. Follow with a barely-damp cloth, working from top to bottom. For textured surfaces (some films have a slight grain), use a soft-bristled brush attachment on your vacuum at the lowest setting. Clean both sides of the window—the interior film and exterior glass—to maximize light blocking.
Storage Between Uses
If you remove stickers seasonally, proper storage is critical. Clean them thoroughly, let air dry completely, then place them back on their original backing sheet or between sheets of parchment paper. Roll rather than fold to prevent creases. Store in a cool, dark place—heat can reactivate adhesives and cause sticking. A cardboard tube from gift wrap makes an ideal storage container.
When to Replace Your Stickers
Even well-maintained blackout stickers have a lifespan. Signs it’s time to replace: edges curling despite proper installation, visible light penetration that wasn’t there before, yellowing or discoloration, or loss of static cling in dry-cling versions. Most budget options last 1-2 years with continuous use. If you’re getting more than two years, you’ve found a exceptional product.
Troubleshooting Common Application Problems
Textured glass—common in older homes—presents the biggest challenge. The tiny peaks and valleys prevent full contact, leaving air gaps that let in light. For lightly textured glass, apply extra pressure with a squeegee, working the film into the texture. For heavily textured surfaces, blackout stickers may never work perfectly; consider using them in combination with removable caulk along the edges.
Curved windows, like those in bay windows or arched designs, require segmenting the film. Apply in strips, overlapping each by 1/4 inch. The overlap should run vertically (top to bottom) rather than horizontally, as this follows the natural curve and reduces visible seams.
Dealing with Textured Glass
If your nursery has frosted or privacy glass, standard blackout stickers struggle to adhere. The solution is counterintuitive: apply a layer of clear smooth contact paper first, then apply the blackout sticker to the contact paper. This creates a smooth substrate for the blackout film to grip. The contact paper is cheap and removable, making this a budget-friendly fix for challenging surfaces.
Managing Curved or Multi-Pane Windows
For arched windows, create a paper template first. Tape butcher paper over the window, trace the exact shape with a marker, then cut it out. Use this template to trim your blackout sticker before application. For multi-pane windows, decide: cover each pane individually (more work but cleaner look) or cover the entire window as one piece (faster but requires precise cutting along muntins).
The Refrigerator Trick for Restoring Adhesion
If edges start lifting after a few months, don’t immediately replace the sticker. Remove it completely, place it on a clean baking sheet, and put it in the refrigerator for 30 minutes. The cold temperature reactivates many pressure-sensitive adhesives. Clean the window again, then reapply using the wet method. This trick can extend life by 6-12 months and works especially well in hot climates where adhesives soften.
Creative Hacks and Alternative Uses
Blackout stickers shine beyond permanent nursery windows. They’re invaluable for travel, turning any hotel or grandparent’s house window into a sleep-friendly environment. Pack a roll in your diaper bag for emergencies. They weigh virtually nothing and take up minimal space.
In shared rooms, use them to create temporary dividers. Apply to a large piece of cardboard or foam core board to block light from an older sibling’s side of the room while the baby sleeps. This is particularly useful in small apartments where separate rooms aren’t an option.
Travel Applications for Maintaining Sleep Routines
When traveling, measure windows in advance using the hotel’s online photos or a quick phone call. Pre-cut pieces to size and store them in a folder. Bring painter’s tape as backup—if the sticker’s adhesive fails on unfamiliar glass, tape the edges for temporary security. Some parents keep a dedicated “travel set” of blackout stickers, separate from their nursery set, so they don’t have to uninstall and reinstall at home.
Temporary Room Dividers for Shared Spaces
Create a “sleep pod” in a corner of your bedroom by attaching blackout stickers to a tri-fold presentation board. This portable dark space gives your baby a consistent sleep environment even when the main room is lit. The board can be folded and stored when not needed, making it ideal for studio apartments or temporary living situations.
Emergency Light Blocking for Daylight Saving Time
The biannual time change wreaks havoc on baby schedules. Blackout stickers provide immediate relief while you adjust wake times gradually. Apply them heavily for the week before and after the change, then slowly remove them over subsequent weeks to help your baby adapt to the new light patterns. This phased approach prevents the shock of sudden schedule shifts.
Knowing When It’s Time to Upgrade
Blackout stickers are a temporary solution, not a permanent fixture. As your child grows and their sleep patterns mature, you may need more sophisticated solutions. If you find yourself reapplying stickers monthly due to wear, or if your toddler has started peeling them off as a game, it’s time to consider upgrades.
Permanent blackout shades or cellular shades with blackout lining offer better insulation and durability. They also provide cordless operation, eliminating strangulation hazards. While they cost more upfront, they last years instead of months and often pay for themselves through energy savings.
Signs Your Blackout Stickers Aren’t Enough
If your baby still struggles with sleep despite pitch-dark conditions, the issue may be temperature or noise, not light. Blackout stickers don’t insulate against heat or cold. In extreme climates, they may even contribute to temperature fluctuations by creating a dead air space that traps heat. Consider this a sign to upgrade to insulated blackout curtains that address multiple environmental factors simultaneously.
Transitioning to Permanent Solutions
Plan the transition strategically. Install new blackout curtains while keeping stickers in place for a week. This allows your baby to adjust to the visual change gradually. Then remove the stickers during a period of good sleep—not when they’re teething or going through a regression. The familiarity of the new curtains combined with the known darkness level creates a smoother transition.
Budget-Friendly Upgrade Paths
If $15 is your current budget but you want to plan ahead, start with stickers and add a tension rod with a simple black sheet behind them. The sheet provides backup darkness if stickers fail, and you can later replace it with proper curtains. This layered approach costs under $25 total but gives you flexibility to upgrade incrementally as funds allow.
Frequently Asked Questions
How many windows will a $15 blackout sticker pack typically cover?
Most packs contain enough material for one standard 24x36 inch window or two smaller 20x24 inch windows. Always check the total square footage listed in product specifications rather than relying on “window count” claims, as window sizes vary dramatically.
Can blackout stickers damage double-pane windows?
Quality blackout stickers won’t damage sealed double-pane windows. However, applying dark films can increase thermal stress by absorbing heat, which in extreme cases may stress the seals. For nursery use, this is rarely an issue, but avoid applying them to windows that already show seal failure (fogging between panes).
Will blackout stickers make my nursery too hot in summer?
Dark colors absorb heat, but most quality films reflect infrared radiation outward. In practice, you’ll see a 2-5°F temperature increase on the glass surface, but minimal impact on room temperature if you have even basic air circulation. For south-facing windows, combine stickers with reflective cellular shades for optimal temperature control.
How do I remove blackout stickers without leaving residue?
Peel slowly at a 180-degree angle (parallel to the glass) rather than pulling straight out. If residue remains, dab with isopropyl alcohol on a microfiber cloth. For stubborn spots, a plastic scraper used at a shallow angle removes residue without scratching glass. Never use metal scrapers or razor blades on tempered glass.
Can I cut blackout stickers to fit odd-shaped windows?
Absolutely. Use sharp scissors or a utility knife with a fresh blade. Cut on a self-healing mat or thick cardboard to protect surfaces. For intricate shapes, create a paper template first. Complex curves may require making small relief cuts so the film can bend without wrinkling.
Are blackout stickers safe to use with window air conditioners?
Yes, but apply the sticker around the AC unit rather than over it. The unit needs proper ventilation and may create condensation that interferes with adhesion. Use foam insulation strips around the AC edges to seal light gaps between the unit and window frame, then apply blackout stickers to the remaining glass area.
How long do budget blackout stickers typically last?
With proper installation and moderate climate conditions, expect 12-18 months of continuous use. Direct sun exposure and extreme temperatures reduce lifespan. Reusable versions may last longer if removed and stored during off-seasons. Signs of aging include curling edges, loss of opacity, and decreased adhesion.
Can I layer multiple blackout stickers for better darkness?
Layering works but isn’t ideal. Two layers block more light but trap air, creating a greenhouse effect that can damage adhesives. Instead of doubling up, invest in a single high-quality blackout sticker and address edge leaks with light-blocking tape. If you must layer, offset the seams so they don’t align, preventing direct light channels.
Do blackout stickers provide any sound dampening?
Minimal. The thin vinyl might absorb very high frequencies, but they won’t significantly reduce traffic noise or loud sounds. For noise control, you need mass—thicker materials like acoustic curtains or window inserts. Don’t expect blackout stickers to solve noise issues; they’re purely for light control.
What’s the difference between blackout stickers and window tint?
Window tint is permanent, applied professionally, and primarily reduces heat/UV while maintaining some visibility. Blackout stickers are removable, user-installed, and designed for maximum light blockage with zero visibility. For nurseries, stickers offer the flexibility and darkness level that tint cannot match, plus they’re significantly cheaper and safer for DIY application.